Getting started
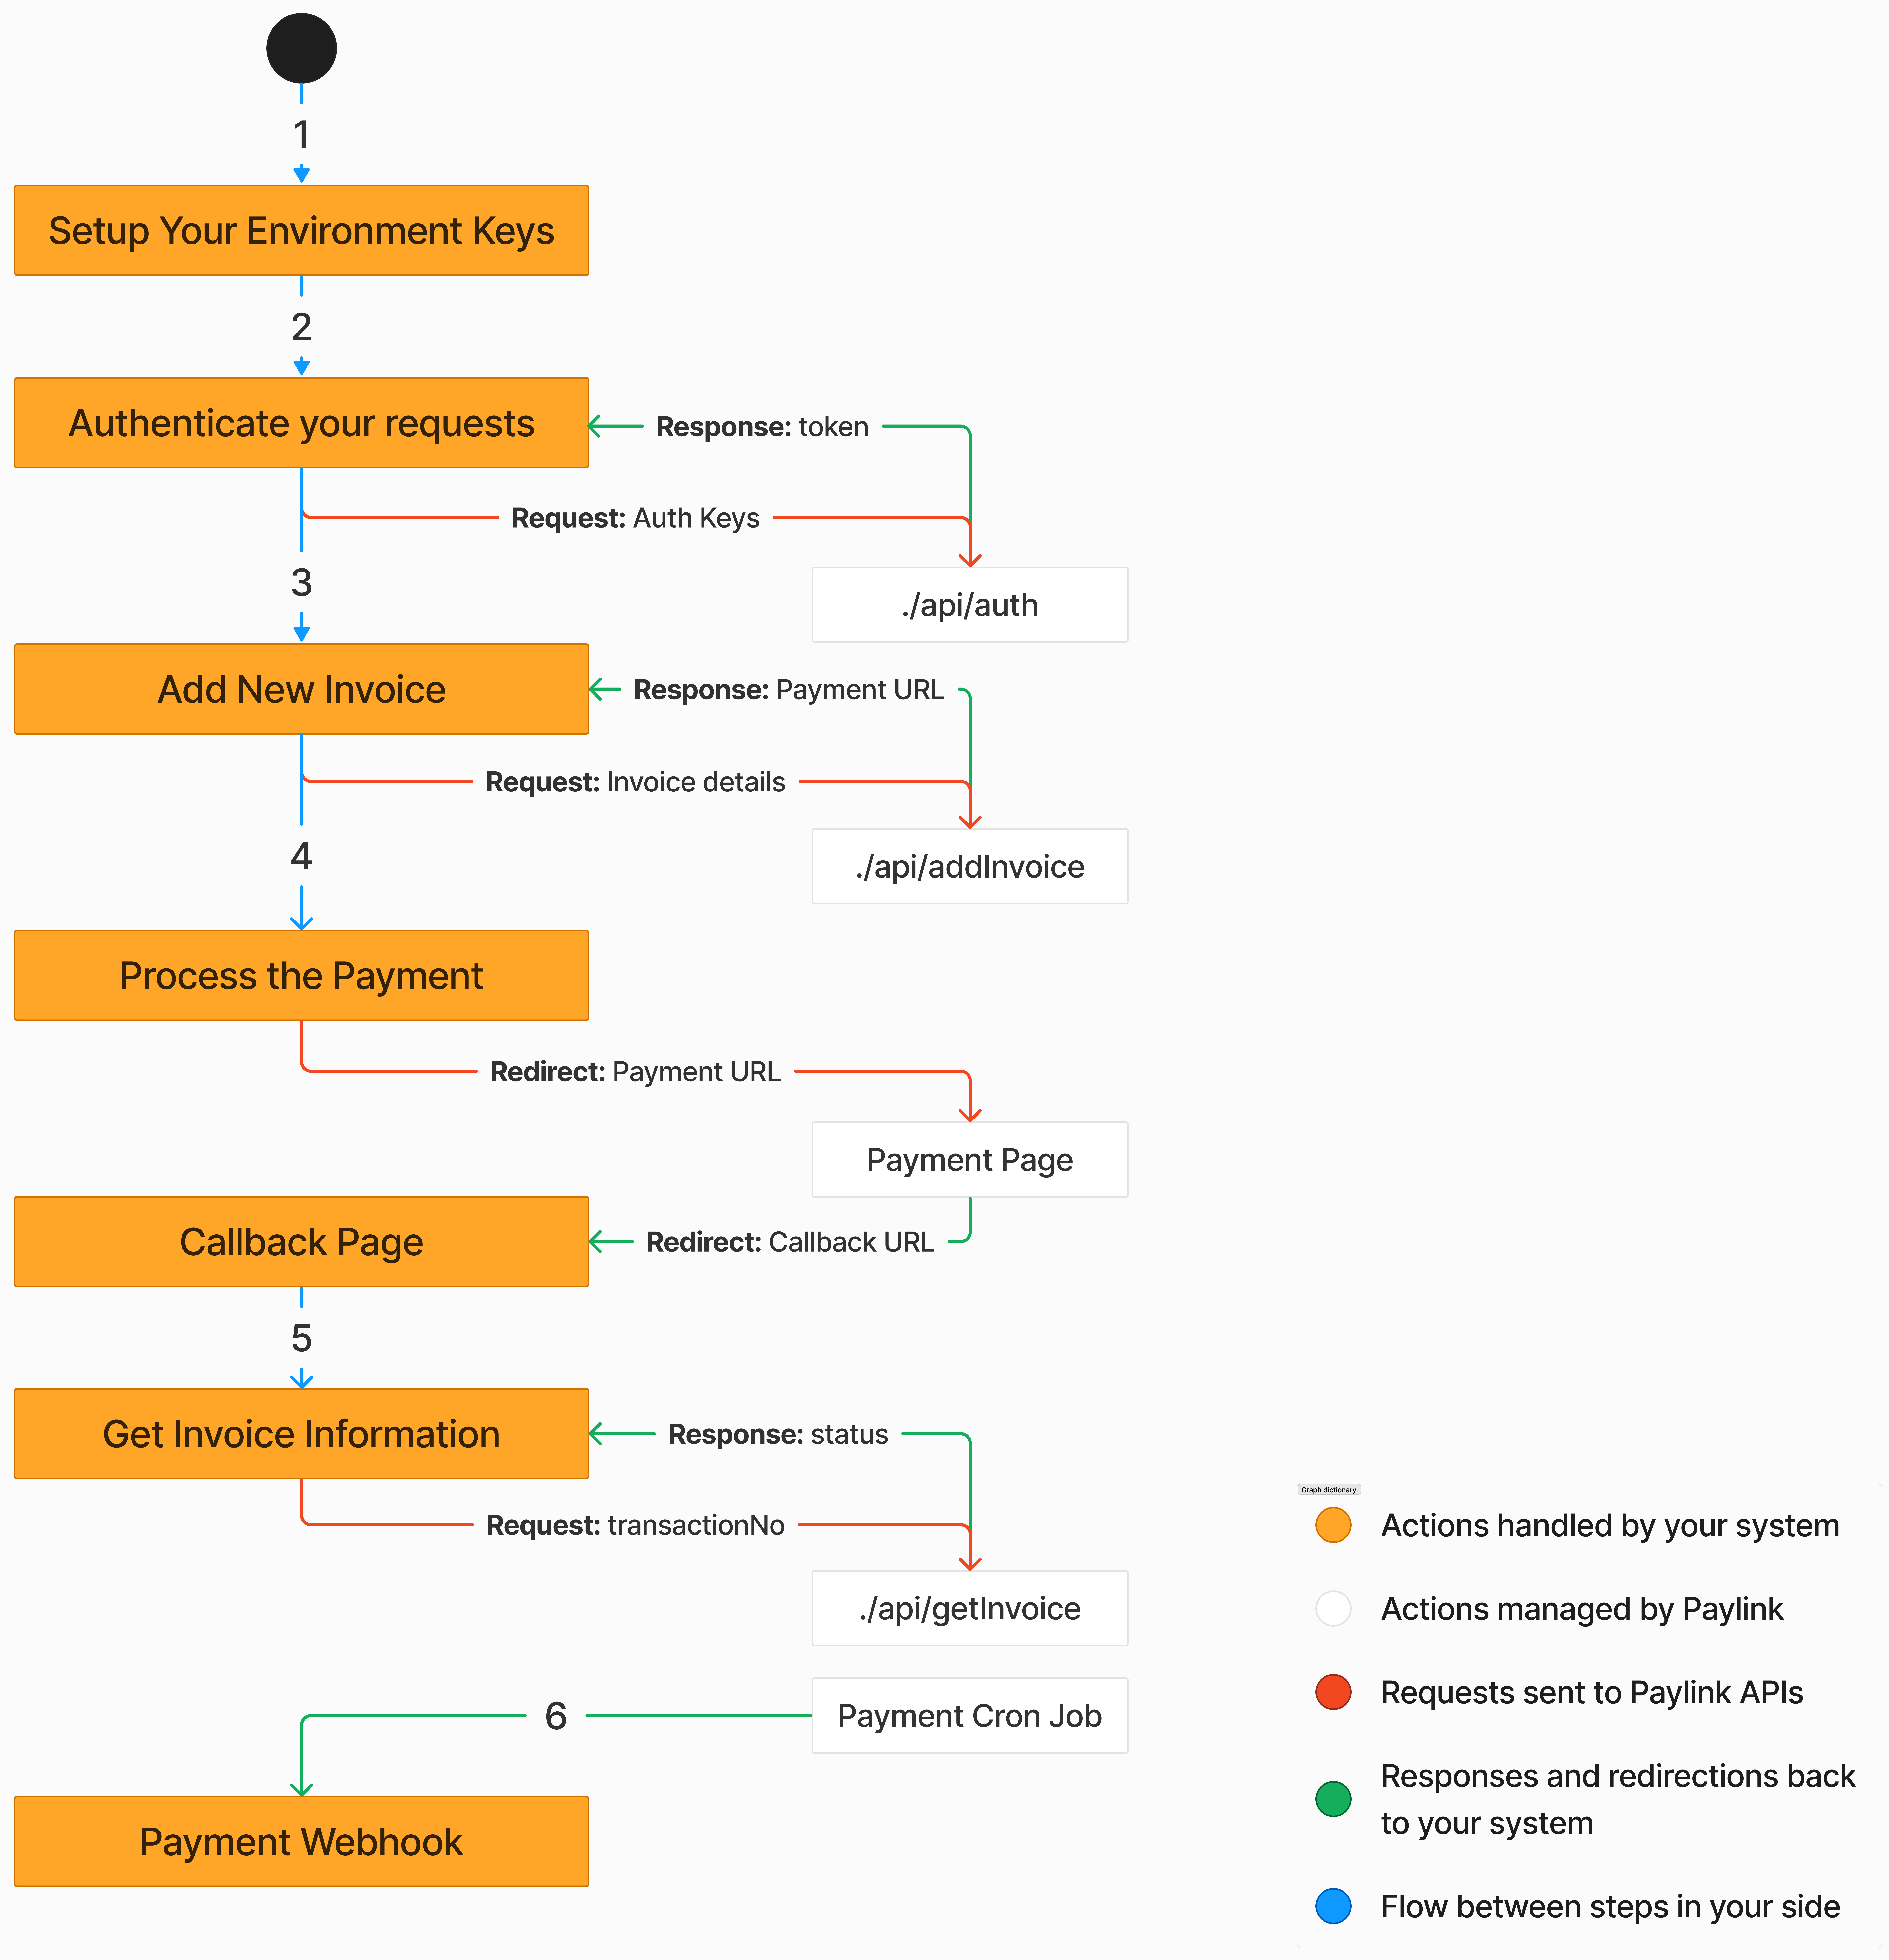
This guide provides step-by-step instructions for integrating the payment system into your application. Follow these steps to ensure a seamless setup and payment processing experience.
Setup & Authentication
-
Environment Configuration 🔗
- Ensure to setup your environments correctly.
- Each environment requires its own BASE URL, API ID, and Secret Key.
-
Authorization Token 🔗
- To call any endpoint, you must use an authorization token.
- Obtain this token from the authentication endpoint.
Generate Invoice
- Create Invoice 🔗
- Send the invoice details to the
/api/addInvoiceendpoint to generate a new invoice. - The response will include the transaction number of the created invoice, which will be used in subsequent steps.
- Send the invoice details to the
Payment Processing
-
Retrieve Invoice Details 🔗
- Retrieve the invoice details by sending the transaction number to the
/api/getInvoiceendpoint. - Invoice detail will include the payment URL, which will be used to process the payment.
- Retrieve the invoice details by sending the transaction number to the
-
Redirect to Payment 🔗
- Redirect your customer to the provided payment URL.
-
Post-Payment Redirection 🔗
- After the user completes the payment, his browser will be redirected back to the
callBackUrlspecified during the invoice generation process.
- After the user completes the payment, his browser will be redirected back to the
Check Payment Status
-
Verify Payment 🔗
- Use the
/api/getInvoiceendpoint to check the payment status and paid amount. - Process the client's order in your system based on the payment status.
- Use the
-
Handle Payment Errors 🔗
- Check for any payment errors that may have occurred during the payment process using the provided payment error codes.

Updated about 1 year ago
